Tampilkan postingan dengan label simple. Tampilkan semua postingan

Jumat, 06 Mei 2016


growing tomatoesTomatoes are one of my favourite vegetable. It is very easy to grow as well as enjoyable to eat. Though technically tomato is a fruit of the plant but we all prefer to call this a vegetable. If you take proper care of your tomato plants, the yield can be overwhelming.

Scientific name : Lycopersicon sp

The tastes of tomatoes are very sensitive to the surroundings. So rather than focusing on only one variety, it is always sensible to try 3 to 4 varieties. It will help you find out which is the best variety suitable to your locality.

Tomato Plants and Sunlight:

Keep your tomato plant to a place where the plant will get plenty of sunlight. The fruit formation of a tomato plant requires at least 6 hours of direct sunlight. You can read more about the effect of sunlight on different plants in our earlier article here.

Tomato Cage for Supporting A Tomato Plant:


A Tomato plant needs support for its growth. You need to build cage or stakes at the time of planting. Staking keeps fruits off the ground whereas a tomato cage help the plant to hold its upright position.

Tomatoes require plenty of water, specially during the summers. But while watering a tomato plant do not wet the leaves or the stem of the plant. Always put water directly into the soil near the roots(see watering guide for details).

Pruning Tomato Plants:

Take out any shoot that grows between the stem and main branches, these shoots always hinder the fruit growth. In gardening this process is called pruning of plants. With the same logic cut off the tip of the plant. It will help the plant to become more bushy with much more fruits.

How To Plant Tomatoes:

You can start either from seed or through seedlings purchased from nurseries. If you are starting from seeds, it is recommended to use seedling trays.fill these trays with potting soil and sow the seeds there. It is important to keep the trays indoor until the seeds germinate. Once they have grown up to 15- 20 cm you can transplant them outdoor. See transplantation techniques for detail.

Before planting the seedlings make the soil ready by tilling and mixing compost or manure with the soil. It is recommended to plant the seedlings 2ft apart.

It is necessary to keep the soil fertile. Add fertilizers two week prior to picking and two weeks after the picking.


Tomato Pests and Diseases:

Tomatoes are particularly susceptible to many pests and diseases. Horn-worms, Aphids, white-flies are few of the tomato pests which can reduce the production of the plant. Late blight (specially during monsoon) and distorted leaves are the common diseases to the plant. It is always wise to plant basil along with your tomato plant. Basil is a fantastic companion plant for tomatoes. It will help in distracting little pests from your tomato plant. This type of planting is called companion planting.

Harvesting Tomatoes:

Never pick tomatoes in green condition they will rot before get ripe. Leave them on the vine as long as possible. Never try to refrigerate ripe tomatoes. It will spoil the texture and taste of the perfectly ripe home grown tomato which is best eaten sun warm from the kitchen garden.

I hope these simple tomato growing tips helped you in growing tomatoes. Do these simple steps and you can enjoy your home grown favourite vegetable and also find the distinctive flavor and taste which are definitely missing when you buy those from the stores.


Thanks for reading. Keep your comments coming.


Read more about tomatoes: 
FAQs About Tomato Growing
Top 8 pests of Tomatoes
Simple steps to save tomato seeds 
Top Five Companion Plants For Tomatoes
Read More..

Jumat, 22 April 2016

One of the best features of a tomato plant is that it is self pollinating. So you dont need to worry about the quality of the tomato seeds unless you are using hybrid variety. There is very little chance of insects polluting the quality of your seeds even though you are growing different varieties of tomatoes together.

Saving the seeds from tomatoes are very easy. First, select mature ripe tomatoes from the plant that has the best flavour (as per your liking) and is not affected by any form of diseases. Then cut the tomatoes in halves across the middle. Next take out the seeds from the fruit with the help of a spoon. If the tomatoes are fully matured it should not be a problem.

You will find the seeds are covered with pulp gelatinous coating. This coating is required for the safety of the seeds and it prevents the seeds from germinating inside the tomato.

To save the seed you need to separate them form the coating. The process used for this is called fermentation. For this you need to put the seeds along with the coating into a jar. Add some water and stir it with a help of a spoon. You can instantly see the juices and some part of the coating are getting separated from the seeds and the water are getting murky. Now remove the murky water and replace it with fresh ones. After that keep the jar in a place far from the sunlight and cover it with a lid. You need to repeat the process for quite some time to remove all the coating from the seeds. It generally requires 2 to 3 days before all the coating gets removed. You need to change the water 4 to 5 times in between these days. Once the coating is removed fully, you can see the clear seeds settling down at the bottom of the pot. Drain out the water and you will get the clean good quality seeds.

To store the seeds for future use you need to remove every bit of moisture from the seeds. Place them on some paper towel and cover them. It is best to store the seeds along with the paper towel so that even the outside moisture can’t interfere with the seeds. And thats it, the process is complete.

So now you know how can you save the seeds from your tomato plants give it a try. By saving your own seeds you will get the same quality of tomatoes for years with no additional costs.

If you have any suggestions regarding tomato seeds saving feel free to share.
Read More..

Kamis, 14 April 2016

transplanting

In case you have seedlings with you and you want to start from seedling and not from the seeds, the following steps will help you.


1.       First make a hole in the ground where you want to transplant the plant. It should be as deep as the height of the container and double of its diameter.
2.       Before transplanting it is almost mandatory to give water to the plant as unless its roots grow it will not be possible for the plant to get water from the soil.
3.       Keep a hold on the stem of the plant and put the pot upside down. Due to gravitation force it will be far easier to take the plant out of the container.
4.       Plant the seedling the same depth as it was in the container.
5.       Cover it with the soil and press gently to ensure the roots are in solid contact with the soil. Make sure the soil remains moist constantly till you see the plant grow.

Try to transplant on a overcast weather condition to give the plant a better chance to adjust to their new home without being withered by direct sun.

Transplanting can be a great way to start gardening as it will definitely increase the chances of survival for the plant and provide the much more enthusiasm for continuing Gardening as a hobby, which has so many benefits of its own.


Check out five cool tips for transplanting a plant in this following video

Read More..

Jumat, 25 Maret 2016

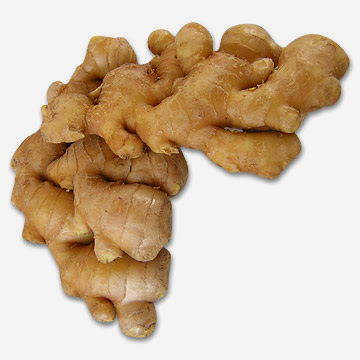
Before starting our discussion about How to grow ginger plants First we need to understand the basics. When we talk about edible part of ginger, we generally refer to ginger root. But it is the rhizomes that we eat.

It is one of the plants which need very less amount of caring and maintenance. You just need to know the basics.

How to grow ginger


How to grow Ginger?


Ginger grows well in humid climates. People living in warmer climates generally do not have problems with growing ginger. In case you are living in a drier place a bit of spraying will definitely benefit the plant. Plant your ginger where you will receive enough sunlight. As mentioned in my article Sun or No-Sun, sunlight is very important for plants of these kinds.

Watering A Ginger Plant:

how to grow gingerWater is also a crucial factor in growing ginger. Make sure the soil is moist while the active growing season of ginger is going on. To make the better use of the soil moisture and preventing it from evaporation use Mulch (Check out more about mulch and mulching by clicking the link). Adding different soil less mediawith the soil can also increase the water retention of the soil. Also try not to over-water. It will also drain out the nutrients from the soil.

Ginger is not a voracious eater. If you have added enough compost (you can find more about composting Ingredients by clicking the link) in the beginning you don’t need to add much. In case you leave in a place where the rain is plenty and your soil gets drenched many times your soil nutrition also fades away with the water. In these cases you need to add nutrients like seaweed, fish extractions or other organic manure from outside.

Harvesting Ginger Roots:

Ginger plant generally takes 8 months or more to mature. You can sense the maturity when you see the dying leaves. Many people pull out ginger earlier than this but the mature ginger always taste better.

While harvesting look out for rhizomes with buds in it, these are easier to use for replanting. While planting always put the eye side (the buds) upwards and just below the soil.

Ginger Flower:

Some varieties of Ginger flowers are exceptionally fragrant. So if you find flowers in your plant you can definitely snip them and use it in other decorative format (like bouquet). Do not worry this will not harm the health of the plant. Flowering needs at least two years. So if you are thinking about flowers you have to harvest very carefully and should only extract a few from here and there.

Ginger As A Companion Plant:

Ginger is a very good companion plant. You can club this with other plants for pest control purposes. You can find more options on different combinations in my earlier article titled Companion Planting: A basic Know-how.

  
 Are you also planting Ginger? Share your experiences with us.
Read More..

Sabtu, 12 Maret 2016


Raised garden beds are always a good option for Gardening. Though it might sound pretty troublesome to prepare garden bed it is not that tough. This article will put some light on Garden bed preparation.

The first thing you need to do to make a raised garden bed is to kill the weeds in the area you have planned your bed. The best way to do this is to first till the area with a tiller or plough it (in case the area is larger).
Raised garden beds
Next add a thick layer of compost and till again. You can also add layers of newspaper or cardboard to cover the area before tilling the soil.

It will kill most of the weeds in the first place. Weeds which have deep roots or runners can be killed easily by this process.

After covering the area with compost add some water to the soil and till it a bit. This will make the weed seed (which are present in the soil) to germinate. Once they germinate, till it once more.

This total process of watering and tilling you need to follow quite a few times. After making sure that there are no more weed seeds present in the soil, you can use your vegetable or other plants. Try not to use seeds at first and go for transplanting in the first year. After that you can use seeds as per your likings.

Another way to get instant garden bed is to cover the whole area with the topsoil bags which are readily available in any garden store. Try not to use cheap quality product but go for the company which is known for their product quality.

Cut one or two areas of each bag and plant your seedling or seeds there. After covering the whole area with topsoil bags, cover the exposed plastic area of the
raised garden bedsbag with thick layer of Mulch. Now you have it, your own garden bed.

This type of permanent raised bed gardening is always helpful and it also makes the surrounding soil much more fertile and healthier. Raised beds warm up faster than normal soil. The best part about garden beds is you can make it any size you want. Keep enough space for walking, beside the garden beds and never walk on the beds.

Keep adding composts at regular intervals. It will keep the beds fertile. First year it is recommended to add 4 to 6 inches of compost. In the subsequent years ½ inch of compost will be enough to provide the required nutrition to the plants.


Have you prepared you garden beds yet? Share your experiences with us.

Read More..
Aloe Vera is some how similar to cactus in terms of their likings to the dry climate. Aloe Vera prefers dry loose and sandy soil. You can increase the looseness of the soil by adding sand or Perlite to the soil. It will also increase the drainage capacity of the soil.

While watering keep in mind that you need to water it thoroughly so that the soil is drenched properly but also make sure that the excess water should not stay
with the soil. Too much water or water logged soil is the most frequent reasons for the death of the plant.

Though it is possible to grow Aloe Vera from seeds we strongly recommend you start with the offshoots. It is much more easier and also the rate of survival is far greater.

Keep your Aloe Vera plant in a place where it will receive enough bright sunlight. Surrounding the soil with white stones around the plant can be a great idea. It would increase the aesthetics as well as save the warmth of sun light.
Aloe Vera plants are generally pest and disease resistant. So in most of the cases you would not have to worry about pest controlling.

There are many offshoots which grows around the plant. It is for the benefit of the plant that you removes those. You can always plant those offshoots in different area and treat that as an individual plant.

Use a sprayer to spray water on the dry leaves once in a week to remove dust. It will also make the leaves green and healthy.

Harvesting:
Generally leaves are harvested from the plant. Larger thicker leaves on the outer side of the plant are the ideal one to get. Use a sharp knife to cut the leaves from the plant. The pulp is very useful for skin.


If you like the article share with others.
Read More..